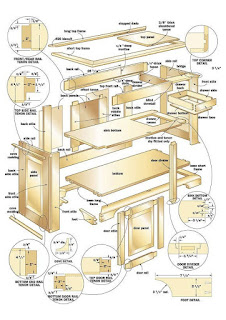
Step-by-Step Outdoor Furniture Plans for Beautiful Outdoor Living

Step-by-Step Outdoor Furniture Plans for Beautiful Outdoor Living

Hey there, fellow outdoor enthusiasts! Are you dreaming of relaxing evenings on your patio, surrounded by beautiful, handcrafted furniture? Forget those overpriced store-bought pieces! Building your own outdoor furniture is more achievable than you think, and incredibly rewarding. This guide will walk you through the process, step-by-step, with plans for a few different projects to get your creative juices flowing.

Choosing Your Project: A Few Ideas to Get You Started

Before we dive into the specifics, let's talk about what you want to build. There are tons of options, each with varying levels of difficulty. To help you choose, here are a few ideas:

A Simple Adirondack Chair:

This classic is a fantastic beginner project. It's relatively straightforward to build, using mostly straight cuts, and requires minimal tools. You'll get a great sense of accomplishment, and it's a timeless piece that will last for years. Plus, Adirondack chairs are super comfy!

A Sturdy Outdoor Bench:

An outdoor bench is perfect for adding seating to your patio, deck, or garden. You can build a simple bench from pressure-treated lumber, or get more creative with different materials like reclaimed wood or even metal. Building a bench offers a chance to practice some more advanced joinery techniques.

A Charming Picnic Table:

A picnic table is a fantastic centerpiece for any outdoor space. It's a larger project, perfect for a weekend project or spread over a few evenings. This project will allow you to hone your skills with measuring, cutting, and assembling larger pieces. You'll also learn more about using different fasteners.

A Stylish Outdoor Coffee Table:

Want something a bit more refined? An outdoor coffee table is a fantastic addition to any patio setting. You can use a variety of materials, from wood to concrete (for a more modern look). This can involve more intricate cuts and potentially some finishing work.

Essential Tools and Materials

Before you get started, gather your essential tools and materials. The exact list will vary depending on your chosen project, but here's a general overview:

  • Measuring Tape: Accuracy is key in woodworking!
  • Saw (Circular Saw or Miter Saw): For cutting your lumber to size.
  • Drill and Drill Bits: For pre-drilling holes and fastening pieces together.
  • Screws or Bolts: Choose outdoor-rated fasteners to withstand the elements.
  • Wood Glue: Enhances the strength and durability of your joints.
  • Safety Glasses and Hearing Protection: Always prioritize your safety!
  • Clamps: To hold pieces together while the glue dries.
  • Sandpaper (various grits): For smoothing out rough edges and creating a professional finish.
  • Exterior Wood Finish (stain, paint, or sealant): To protect your furniture from the weather.
  • Lumber: Pressure-treated lumber is ideal for outdoor furniture, ensuring it can withstand moisture and pests. Choose the appropriate dimensions based on your chosen plan.

Step-by-Step Guide (Example: Adirondack Chair)

Let's focus on building a simple Adirondack chair. This is a perfect project to start with!

Step 1: Gather your materials and cut the lumber according to your plan.

Find a detailed plan online (plenty of free ones are available!) and carefully measure and cut your lumber accordingly. Accurate cuts are crucial for a sturdy chair.

Step 2: Assemble the chair seat.

Use wood glue and screws to attach the seat slats to the chair's main support pieces. Take your time and make sure everything is aligned properly. Clamps can be really helpful here.

Step 3: Attach the backrest slats.

Next, add the backrest slats, following the pattern indicated in your plan. Again, use wood glue and screws for a strong and secure connection. Make sure the slats are evenly spaced and angled correctly.

Step 4: Attach the legs and supports.

Carefully attach the legs and supporting structures to the seat and backrest. This might involve some slightly more complex joinery, depending on your plan, but take your time and follow the instructions closely.

Step 5: Sand and finish.

Once the chair is assembled, sand all the surfaces smooth, paying close attention to any rough edges. Apply your chosen exterior finish – stain, paint, or sealant – to protect the wood from the elements and give it a beautiful finish. Let it dry completely before use.

Tips for Success

  • Start with a simple project: Don't overwhelm yourself! Building an Adirondack chair or a simple bench is a great way to gain experience.
  • Read the plans carefully: Understand the instructions completely before you start cutting.
  • Measure twice, cut once: This is a classic woodworking adage, and for good reason! Accuracy is key.
  • Use quality materials: Invest in good-quality lumber and fasteners for a more durable and longer-lasting piece of furniture.
  • Take your time: Rushing the process can lead to mistakes. Enjoy the process and celebrate your progress.
  • Don't be afraid to ask for help: If you get stuck, there are plenty of online forums and communities dedicated to woodworking where you can find assistance.

Commonly Asked Questions

Q: What type of wood is best for outdoor furniture?

A: Pressure-treated lumber is a great choice for outdoor furniture because it's resistant to rot, decay, and insects. Cedar and redwood are also popular options, but they are more expensive and require more maintenance.

Q: How do I protect my outdoor furniture from the weather?

A: Applying a high-quality exterior wood finish (stain, paint, or sealant) is essential to protect your furniture from moisture, UV rays, and insects. Reapply the finish every year or two, depending on the product and the climate.

Q: Can I use reclaimed wood for my project?

A: Absolutely! Reclaimed wood can add a unique character to your outdoor furniture. However, make sure to inspect it carefully for any signs of rot or damage before using it.

Q: How long does it take to build a piece of outdoor furniture?

A: This varies greatly depending on the project's complexity and your experience level. A simple Adirondack chair might take a weekend, while a more complex picnic table could take several days or even longer.

Happy building, and enjoy your beautiful new outdoor space!

Share:

Furniture Plans Coffee Table Designs for DIY Builders

Furniture Plans: Coffee Table Designs for DIY Builders

Hey there, fellow DIY enthusiasts! So you're itching to build your own coffee table? Fantastic! There's something incredibly satisfying about crafting something beautiful and functional with your own two hands. And a coffee table? That's a perfect project to showcase your skills. It's relatively small (compared to, say, a whole kitchen remodel!), manageable for most skill levels, and the possibilities for design are practically endless. Let's dive into some inspiring coffee table plans that you can tackle, no matter your woodworking experience.

Simple & Rustic Coffee Table Plans

If you're just starting out with woodworking, or you're looking for a quick and easy project, a rustic-style coffee table is a great place to begin. These designs often rely on straightforward construction techniques and readily available materials, making them perfect for beginners.

The Pallet Coffee Table

This is probably the easiest option. Repurpose old shipping pallets into a unique and charming coffee table. You'll need to carefully disassemble the pallets (watch out for nails!), sand down the wood to remove splinters and rough edges, and then reassemble the planks into your desired shape. You can leave the rustic look as is, or add a coat of stain or paint for a more polished finish. This project requires minimal tools and skills, making it ideal for absolute beginners.

Pro-tip: Always check the pallets for any signs of pest infestation before you start working with them.

The Simple Wooden Box Coffee Table

Another easy option involves building a coffee table from simple wooden boxes. You can purchase pre-made wooden crates or build your own. Stack them, secure them with wood glue and screws, and add some simple legs. You can stain or paint the boxes to match your existing décor. This is a great way to add a touch of rustic charm to your living room without breaking the bank or spending hours in the workshop.

Mid-Century Modern Coffee Table Designs

Mid-century modern furniture is all the rage these days, and for good reason. Its clean lines, simple design, and timeless aesthetic make it incredibly versatile. Building your own mid-century modern coffee table is a fantastic way to add a touch of sophistication to your home.

The Tapered Leg Coffee Table

This design often features a simple rectangular or square top with four tapered legs. You can use various hardwoods, such as walnut or oak, for a luxurious feel. The challenge here lies in creating those perfectly tapered legs; a table saw and some careful measuring are key. But don't worry, there are plenty of tutorials online to guide you through the process.

The Floating Shelf Coffee Table

A floating shelf coffee table creates a sleek and minimalist look. It involves attaching a thick, sturdy shelf to the wall using hidden brackets. This requires careful planning and precise measurements to ensure stability and a clean aesthetic. It's a more ambitious project, but the final result is seriously impressive.

Unique and Advanced Coffee Table Designs

If you're a more experienced DIYer looking for a challenging and rewarding project, these designs will push your skills and creativity.

The Live Edge Coffee Table

Live edge coffee tables showcase the natural beauty of the wood. They use slabs of wood with the natural bark edge still intact, creating a unique and visually stunning piece of furniture. Working with live edge wood requires some special tools and techniques (like stabilizing the wood to prevent cracking) but the result is a truly one-of-a-kind masterpiece.

The Coffee Table with Drawers or Storage

Adding drawers or a hidden storage compartment to your coffee table is a great way to enhance its functionality. This involves more complex joinery techniques and careful planning, but it's worth the extra effort. You can use dovetail joints for a truly professional look, or opt for simpler techniques like dado joints if you're less experienced with joinery.

The X-Base Coffee Table

An X-base coffee table boasts a stylish and contemporary design. This style usually involves a simple tabletop supported by an X-shaped base. While visually striking, constructing the X-base requires precise cuts and strong joinery to ensure stability.

Choosing Your Materials and Tools

Before you start building, it's crucial to choose the right materials and tools for your project. For most coffee tables, you'll need wood (consider hardwood for durability), wood glue, screws, sandpaper, stain or paint (optional), and a variety of woodworking tools. These might include a saw (circular saw, miter saw, or hand saw), a drill, a sander, clamps, and measuring tools.

Remember to always prioritize safety when working with power tools. Wear appropriate safety gear, such as safety glasses and ear protection.

Finding Plans and Tutorials

Numerous online resources can provide you with detailed plans and tutorials for building coffee tables. Websites like Pinterest, YouTube, and various woodworking blogs offer a wealth of inspiration and step-by-step instructions. Don't hesitate to search for specific designs, like "DIY pallet coffee table" or "mid-century modern coffee table plans," to find exactly what you're looking for.

Frequently Asked Questions (FAQ)

Q: What's the best type of wood to use for a coffee table?

A: Hardwoods like oak, walnut, maple, and cherry are durable and beautiful options. However, softer woods like pine are also suitable, especially for beginner projects. The choice ultimately depends on your budget and aesthetic preferences.

Q: How long does it take to build a coffee table?

A: This varies greatly depending on the design's complexity and your experience level. A simple pallet coffee table might take a few hours, while a more intricate design could take several days or even weeks.

Q: Do I need to be a skilled woodworker to build a coffee table?

A: No! There are plenty of beginner-friendly designs available. Start with a simple project to build your confidence and skills before tackling more complex designs.

Q: Where can I find plans for free?

A: Many websites and blogs offer free coffee table plans. YouTube is also a great resource for visual tutorials.

Q: What if I make a mistake?

A: Don't worry! Everyone makes mistakes, especially when starting out. Woodworking is a learning process. Embrace the imperfections – they often add to the unique charm of a handmade piece! And remember, you can always sand it down and try again!

Happy building!

Share:

Do-It-Yourself Woodworking Plans for Every Skill Level and Project

Do-It-Yourself Woodworking Plans for Every Skill Level and Project

Hey there, fellow woodworkers (aspiring or experienced)! Are you itching to build something amazing with your own two hands? Whether you're a seasoned pro or just starting out, the world of woodworking offers endless possibilities. The key is finding the right plans, and that's exactly what we're here for today. We'll explore a range of DIY woodworking plans, categorized by skill level, so you can find the perfect project to match your abilities (and your ambition!).

Beginner-Friendly Woodworking Projects: Get Your Feet Wet (and Your Hands a Little Sawdusty!)

Starting out can be intimidating, but trust me, the satisfaction of completing your first project is incredible! These beginner projects focus on simple techniques and straightforward designs, building your confidence and skills along the way.

Simple Shelves: A Classic for a Reason

Shelves are a fantastic starting point. You can build them from readily available lumber, and the design can be as basic or decorative as you like. Think floating shelves for a modern look, or sturdy, rustic shelves for a more traditional feel. Focus on precise measurements and straight cuts – that's the biggest hurdle for beginners. Online tutorials abound for different shelf styles; find one that appeals to you and get building!

A Birdhouse: A Tiny Project, Big Reward

Birdhouses are adorable, fun, and surprisingly easy to construct. They require minimal tools and materials, making them perfect for a first project. Many free plans are available online – choose one that suits your taste (perhaps a charming little cottage-style birdhouse or a sleek modern design). Remember to use exterior-grade wood to protect it from the elements.

A Wooden Coasters Set: Practice Makes Perfect

Coasters are a great way to hone your cutting and sanding skills. You can get creative with the shapes and sizes, and experiment with different wood types to achieve various looks. This project teaches you about finishing – applying a protective coat of varnish or stain adds a professional touch. Plus, you'll have a stylish set to enjoy!

Intermediate Woodworking Projects: Level Up Your Skills

Once you've mastered the basics, it's time to challenge yourself with more complex projects. These require a bit more precision, attention to detail, and the use of additional tools, but the results are truly rewarding.

A Coffee Table: A Statement Piece for Your Living Room

Building a coffee table is a significant undertaking, but one that will boost your skills considerably. You'll need to work with larger pieces of wood, understand joinery techniques (like mortise and tenon or dowel joints), and potentially incorporate drawers or shelves. There are countless designs available – choose one that fits your style and skill level. Remember to plan carefully and take your time.

A Bookshelf: Functionality Meets Design

Bookshelves are another excellent intermediate project. They offer a chance to experiment with different joinery methods and explore more intricate designs. Consider building a leaning bookshelf for a minimalist look or a more substantial freestanding unit. Pay close attention to the stability of the structure, as you'll be placing weight on it.

A Small Desk: Perfect for a Home Office

A small desk or writing table is a rewarding project that combines joinery, finishing, and potentially even some simple drawer construction. Choose a design that suits your space and desired functionality – a simple, sleek design, or something more ornate, depending on your aspirations. Accurate measurements are critical for a desk that's both functional and aesthetically pleasing.

Advanced Woodworking Projects: For the Master Craftsman

If you're ready to take on a real challenge, these advanced projects will test your skills and push your creativity to the limit. They often involve intricate joinery, complex designs, and potentially the use of specialized tools.

A Dining Table: A Centerpiece for Gatherings

Crafting a dining table is a major undertaking, requiring significant woodworking expertise. You'll be working with large pieces of wood, employing advanced joinery techniques, and ensuring structural integrity. Careful planning and precise execution are paramount. Consider incorporating unique features like live edge designs or intricate leg details to make it truly special.

A Custom-Built Cabinet: Storage and Style Combined

Building a custom cabinet demands high levels of skill and attention to detail. You'll need to master various joinery techniques, design the internal layout carefully, and ensure the doors and drawers operate smoothly. Consider the overall design, functionality, and finishing to create a cabinet that is both beautiful and practical.

A Complete Bed Frame: The Ultimate Woodworking Challenge

Constructing a bed frame is arguably the ultimate test of woodworking skills. It demands precision, strong joinery, and careful consideration of structural integrity. You'll be working with long, heavy lumber, so proper safety measures are essential. Careful planning, accurate cuts, and strong joints are absolutely crucial for a safe and sturdy bed frame.

Commonly Asked Questions

  • Where can I find woodworking plans? Many websites offer free and paid woodworking plans. Search online for "DIY woodworking plans" or check out popular woodworking forums and communities.
  • What tools do I need to get started? For beginners, a basic set of tools including a saw, hammer, screwdriver, measuring tape, and sandpaper is sufficient. As you advance, you may want to invest in more specialized tools.
  • What type of wood should I use? The choice of wood depends on the project and your budget. Pine is a popular and affordable option for beginners, while hardwoods like oak or cherry offer greater durability and aesthetic appeal.
  • How do I finish my project? Finishing enhances the appearance and durability of your woodworking projects. You can apply stains, varnishes, or paints to achieve the desired look and protect the wood from wear and tear.
  • What if I make a mistake? Don't worry – everyone makes mistakes! Woodworking is a learning process. If you make a mistake, try to fix it if possible, or learn from it for your next project.

So, there you have it! A wide array of woodworking plans to get you started on your creative journey. Remember to start small, build your skills gradually, and most importantly, have fun! Happy woodworking!

Share:

First Woodworking Project Ideas for New Builders

So You Want to Start Woodworking? Awesome! Here Are Some Perfect First Projects

So, you've got the woodworking bug? Fantastic! It's a rewarding hobby, and honestly, there's nothing quite like creating something beautiful and functional with your own two hands. But where do you even begin? Picking your first project can feel overwhelming, so I'm here to help you navigate those early steps and choose a project that will be both fun and achievable.

Choosing Your First Project: Keep it Simple (Really!)

The most important thing when picking your first woodworking project is to keep it simple. Resist the urge to jump into building a complex armoire or a fancy rocking chair on your very first attempt. You'll likely end up frustrated and potentially discouraged. We want you to have a positive experience, right? So, focus on projects that will let you learn basic techniques without too much complexity.

Why Simple Projects are Best for Beginners:

  • Builds Confidence: Successfully completing a simple project will give you the confidence to tackle more challenging ones later.
  • Develops Fundamental Skills: Simple projects allow you to practice essential skills like measuring, cutting, sanding, and finishing.
  • Minimizes Frustration: Avoiding complex designs means fewer chances for mistakes and less time spent troubleshooting.
  • Faster Completion: Seeing a project through to completion quickly is motivating! It gives you a sense of accomplishment and encourages you to continue.

Five Perfect First Woodworking Projects

Okay, let's talk specifics. Here are five fantastic options for your first woodworking project, each designed to teach you different techniques and build your skills:

1. A Simple Shelf

This is probably the ultimate beginner's project. A simple shelf requires only basic tools – a saw (hand saw or circular saw), a drill, sandpaper, and wood glue. You can choose from various wood types, depending on what's available and your budget. Pine is a good, affordable option for beginners. The key is to practice your measuring and cutting skills, ensuring your cuts are straight and your shelf is level. Once you've mastered this, you can easily move on to more complex shelf designs.

2. A Wooden Box

Building a small wooden box is a great way to learn about joinery techniques, particularly miter joints (though you can certainly use simpler butt joints for your first attempt). Again, measure carefully! You can decorate your box once it's complete – paint it, stain it, burn designs into it. The possibilities are endless! This project is excellent for honing your skills with measuring, cutting, assembling, and finishing.

3. A Coasters Set

These are small, quick projects that are perfect for practicing your precision. You can create a set of four coasters using scrap wood or inexpensive wood. You can experiment with different shapes and sizes, and the small scale makes it less intimidating to make mistakes. This is a great option for learning about sanding and finishing techniques as well.

4. A Cutting Board

A cutting board is a functional and visually appealing project that's not as simple as it seems. It introduces you to working with different wood types – hardwoods like maple or cherry are excellent choices for cutting boards – and to the importance of food-safe finishes. This project is more challenging than a shelf or box, but still very achievable for beginners and it teaches you about wood grain orientation for strength and durability.

5. A Birdhouse

Building a birdhouse is a fun and rewarding project that combines several woodworking techniques. You'll need to cut various shapes and sizes of wood, learn how to assemble the pieces, and add a roof. This project also teaches you about the importance of precise cuts and using nails or screws effectively. Remember to use exterior-grade wood and finish to withstand the elements.

Essential Tools for Your First Projects

You don't need a fully equipped workshop to get started. For these beginner projects, you'll likely need:

  • Measuring Tape: Accuracy is key!
  • Pencil: For marking your cuts.
  • Hand Saw or Circular Saw: For cutting the wood.
  • Drill: For pilot holes (very important!) and assembling pieces.
  • Sandpaper: Various grits for smoothing surfaces.
  • Wood Glue: An essential for joining pieces.
  • Clamps: To hold pieces together while the glue dries.
  • Safety Glasses: Always protect your eyes!

As you progress, you can gradually add more specialized tools to your collection.

Tips for Success

  • Start Small: Choose a project that's manageable in size and complexity.
  • Read the Instructions Carefully: Before you start cutting, understand the plan thoroughly.
  • Measure Twice, Cut Once: This old adage is incredibly important.
  • Take Your Time: Don't rush the process. Woodworking is about enjoying the journey.
  • Ask for Help: Don't be afraid to seek advice from more experienced woodworkers.
  • Have Fun!: Woodworking should be enjoyable. Embrace the learning process and celebrate your successes.

Commonly Asked Questions

Q: What kind of wood should I use for my first project?

A: Pine is an excellent choice for beginners because it's relatively inexpensive and easy to work with. However, you can use scrap wood if you have it!

Q: What if I make a mistake?

A: Don't worry! Everyone makes mistakes. Try to learn from them and move on. Sometimes, a seemingly disastrous mistake can even lead to a unique and interesting result.

Q: Where can I find woodworking plans?

A: You can find countless free woodworking plans online, on websites like Pinterest, Instructables, and various woodworking blogs. Many woodworking supply stores also offer plans.

Q: Do I need a workshop?

A: Not necessarily. You can start woodworking in your garage, basement, or even outdoors (weather permitting). A well-lit area with enough space to work comfortably is all you really need.

Q: What's the best way to learn more about woodworking?

A: There are many resources available, including online tutorials (YouTube is a great place to start!), books, and local woodworking classes. Joining a woodworking club or forum can also be incredibly helpful for connecting with others and getting advice.

So, get out there, choose a project, gather your tools, and start creating! Happy woodworking!

Share:

Craft Your Own Custom Furniture with These Comprehensive Making Plans

Unlock Your Inner Craftsperson: Comprehensive Furniture Making Plans

Tired of mass-produced furniture that lacks character and personality? Yearning to create unique pieces that reflect your style and enhance your home? Then prepare to embark on a rewarding journey into the world of custom furniture making! This article provides you with comprehensive plans, empowering you to design and build your dream pieces, from simple shelving units to intricate tables and chairs. No prior woodworking experience is strictly necessary; the key is a willingness to learn and a passion for creating.

Choosing Your First Project: A Smart Start

Beginners often feel overwhelmed by the sheer variety of furniture options. Don't let this deter you! Start with a project that balances challenge with achievable results. A simple bookshelf, for instance, allows you to master fundamental joinery techniques like doweling and screwing, while simultaneously providing a practical piece for your home. Consider these factors when selecting your first project:

Factors to Consider:

  • Complexity: Opt for a design with a manageable number of components and steps.
  • Material: Start with readily available and easy-to-work-with materials like pine or plywood.
  • Tools Required: Choose a project that aligns with your existing toolset, or that only requires tools easily accessible from local rental stores.
  • Time Commitment: Be realistic about the time you can dedicate to the project and avoid biting off more than you can chew.

Essential Tools and Materials: Gathering Your Arsenal

Before you dive into construction, ensure you have the necessary tools and materials. While the specific requirements vary depending on your chosen project, some essentials include a measuring tape, saw (hand saw or circular saw), drill, screwdriver, sandpaper, wood glue, clamps, and safety glasses. Always prioritize safety! Invest in quality safety gear, and familiarize yourself with safe operating procedures for all tools before commencing your work. For more complex projects, you might need a planer, router, or even a table saw; however, these are often available for rent if you don't plan on making furniture regularly.

Step-by-Step Guide: Building a Simple Bookshelf

Let's build a simple, three-shelf bookshelf as an example. This project is perfect for beginners and utilizes straightforward techniques.

Materials Needed:

  • Wood: Pine boards (dimensions will depend on desired bookshelf size)
  • Wood Glue: A high-quality wood glue is essential for strong joints.
  • Screws: Choose screws appropriate for the wood thickness.
  • Sandpaper: Various grits for smoothing surfaces.

Construction Steps:

  • Cut the wood: Accurately cut the boards to the required lengths for the shelves and sides using your chosen saw. Measure twice, cut once!
  • Assemble the sides: Use wood glue and screws to attach the side pieces to the top and bottom shelves, ensuring everything is square and aligned.
  • Add the remaining shelves: Position and attach the remaining shelves to the sides, again using glue and screws.
  • Sand and finish: Sand all surfaces to a smooth finish. Apply a wood stain or paint for protection and aesthetic appeal.

Remember, this is a simplified guide. Detailed plans with precise measurements and diagrams are readily available online and in woodworking books. Don't hesitate to consult multiple resources to deepen your understanding and ensure success.

Beyond the Basics: Expanding Your Furniture-Making Skills

Once you've mastered a simple project, explore more advanced techniques such as mortise and tenon joinery, dovetail joints, and using different types of wood. Experiment with different finishes and explore various design styles. The world of custom furniture making is vast and exciting; the only limit is your imagination and willingness to learn. So grab your tools, unleash your creativity, and transform your home with unique, handcrafted furniture!

Share:

First Woodworking Project Ideas for Building Confidence

Conquer the Woodshop: Easy First Woodworking Projects to Build Confidence

Stepping into the world of woodworking can feel daunting, especially for beginners. The sheer variety of tools, techniques, and potential for error can be overwhelming. But fear not! With the right approach and a few carefully chosen projects, you can quickly build confidence and unlock a world of creative possibilities. This article focuses on simple, rewarding projects perfect for your first foray into woodworking, turning apprehension into accomplishment.

Choosing Your First Project: Starting Small and Simple

The key to a successful first woodworking project is choosing something manageable. Avoid ambitious undertakings that require complex joinery or intricate designs. Instead, focus on projects that emphasize basic skills and allow you to develop a feel for the tools and materials. Think straight lines, simple cuts, and minimal assembly. This approach minimizes frustration and maximizes your chances of finishing the project feeling proud of your accomplishment. Remember, the goal is to build confidence, not to create a museum-quality piece on your first attempt.

Three Perfect Beginner Projects:

  • A Simple Shelf: A straightforward shelf requires only a few cuts and basic fastening techniques. You can choose any type of wood you prefer, and the design possibilities are endless (floating, wall-mounted, etc.). Focus on accurately measuring and cutting the wood to the desired dimensions. This project reinforces precise measuring and sawing skills.
  • A Wooden Coasters Set: These small, square or round coasters are an excellent introduction to shaping and finishing wood. Choose a durable hardwood and practice your sanding techniques to achieve a smooth, polished surface. Experiment with different finishes to personalize your set. This project introduces you to sanding, finishing, and possibly using a router (for curved edges) in a manageable size.
  • A Basic Birdhouse: A simple birdhouse is a more challenging project, yet still achievable for beginners. It involves slightly more complex cuts and the assembly of multiple parts. However, the rewarding feeling of creating a functional and aesthetically pleasing birdhouse is worth the extra effort. This helps develop your understanding of joining techniques (like nailing or screwing).

Essential Tools and Materials for Beginners

Before you begin, gather the necessary tools and materials. While a fully equipped workshop isn't necessary for your first project, you will need a few key items. Invest in good quality hand tools, starting with a reliable measuring tape, a hand saw (or a circular saw if comfortable), sandpaper (various grits), wood glue, clamps (for holding pieces together during assembly), and a safety-focused approach. Begin with hand tools to gain a better feel for working with wood.

Essential Tool List:

  • Measuring Tape: Accurate measurements are crucial.
  • Hand Saw or Circular Saw: For cutting wood to size. Start with a hand saw to learn the process; a circular saw offers more speed.
  • Sandpaper (various grits): For smoothing surfaces.
  • Wood Glue: For joining pieces of wood.
  • Clamps: To hold pieces together during gluing and assembly.
  • Safety Glasses: Always prioritize eye protection!

Mastering Basic Techniques

Success in woodworking hinges on mastering a few fundamental techniques. Practice makes perfect, so don't be afraid to experiment. Focus on achieving clean, accurate cuts and using proper sanding techniques to achieve a smooth, polished finish. Take your time, pay attention to detail, and don't rush the process. Watch plenty of videos of each step to gain a stronger understanding of how each tool and technique works. Remember that practice will improve your precision.

Key Techniques to Practice:

  • Accurate Measuring: Double-check your measurements before cutting.
  • Precise Cutting: Use a saw guide for straight cuts and master smooth, controlled cuts.
  • Effective Sanding: Sand with the grain to avoid scratches and achieve a smooth finish.
  • Proper Gluing: Apply glue sparingly and clamp firmly to ensure a strong bond.

Remember, your first woodworking project is about learning and enjoying the process. Don't be discouraged by minor imperfections; celebrate your accomplishments and use each project as an opportunity to improve your skills. Soon enough, you'll be tackling more complex projects with confidence and skill!

Share:

Step-by-Step House Furniture Plans for Home Projects

Step-by-Step House Furniture Plans for Your Next Home Project

Hey there, fellow DIY enthusiasts! So you're thinking about tackling a furniture project? Awesome! Building your own furniture is incredibly rewarding, not to mention a fantastic way to save money and create truly unique pieces that perfectly match your style. This guide will walk you through the process, from initial planning to the final sanding, in a way that's easy to understand, even if you're a complete beginner. Let's get started!

1. Planning Your Furniture Project: Dream it, then Draw it!

Before you even think about grabbing a saw, you need a solid plan. This isn't about creating architect-level blueprints (unless you're feeling ambitious!), but rather a clear understanding of what you're building. Think about it like baking a cake – you wouldn't just throw ingredients together, would you?

1.1 Choosing Your Project:

What are you making? A simple coffee table? A sturdy bookshelf? A majestic king-size bed? Start small if you're new to this. A simple nightstand or a small end table is a perfect beginner project. Once you've mastered the basics, you can move on to more complex pieces.

1.2 Sketching Your Design:

Grab a pencil, some paper, and let your creativity flow! Sketch out your design from multiple angles. Don't worry about making it perfect; this is just to visualize your project. Note down the dimensions of each component (height, width, depth). Think about the overall aesthetic – modern, rustic, minimalist? This will guide your material choices.

1.3 Material Selection:

This is where things get interesting! Consider the type of wood you'll use. Pine is affordable and easy to work with, while hardwoods like oak or cherry offer durability and a more luxurious look, but are more challenging to cut and shape. Plywood is a great option for flat surfaces, providing stability and affordability. Consider the project's intended use and your skill level when choosing your materials.

Don't forget about other necessary materials:

  • Wood screws: Different sizes for different applications.
  • Wood glue: Essential for strong joints.
  • Sandpaper: Various grits for smoothing surfaces.
  • Finish: Stain, paint, varnish, or oil, depending on your desired look.
  • Hardware: Hinges, knobs, handles, etc.

2. Cutting and Assembling Your Furniture

Now for the fun part (and maybe a little sawdust)! This stage requires precision and careful measurement. Safety should always be your top priority. Always wear safety glasses and hearing protection.

2.1 Cutting the Wood:

Using your measurements from the design phase, carefully cut the wood to the required dimensions. A circular saw, miter saw, or even a hand saw will work, depending on your project and comfort level. Remember to account for the thickness of the wood when making your cuts. If you're unsure, it's always better to err on the side of slightly larger cuts.

2.2 Joining Techniques:

There are several ways to join pieces of wood:

  • Pocket holes: Using a jig to create angled holes for screws, offering strength and a clean look.
  • Dowels: Using wooden dowels and glue for a strong, invisible joint.
  • Mortise and tenon: A more advanced joinery technique, creating a strong and visually appealing connection.
  • Butt joints: A simple joint where two pieces are butted together and secured with screws or glue. This is best for less-stressful parts of your furniture.

2.3 Assembling the Pieces:

Once all your pieces are cut, carefully assemble them according to your plan. Use clamps to hold pieces together while the glue dries. Take your time and double-check everything before you tighten screws or finalize the glue.

3. Finishing Touches: Sanding and Finishing

The final steps are crucial in transforming your creation from a functional piece to a beautiful piece of furniture. This is where your furniture goes from "rough draft" to "ready to show off!"

3.1 Sanding:

Start with a coarser grit sandpaper (around 80 grit) to remove any imperfections or sharp edges. Gradually move to finer grits (120, 180, and even 220 grit) for a super-smooth finish. Sand with the grain of the wood to avoid scratches.

3.2 Applying the Finish:

Choosing the right finish depends on your preference and the type of wood you used.

  • Stain: Enhances the natural wood grain and color.
  • Paint: Provides a solid color and protection.
  • Varnish: Offers a durable, clear finish that protects against scratches and water damage.
  • Oil: Soaks into the wood, protecting it and enhancing its natural beauty.

Always follow the manufacturer's instructions for applying the finish. Multiple thin coats are generally better than one thick coat.

3.3 Adding Hardware:

Once the finish is dry, install any necessary hardware, such as knobs, handles, hinges, or drawer slides. This is the final step that transforms your project from a frame into a fully functional piece of furniture.

4. Celebrating Your Success!

Congratulations! You've built your own piece of furniture. Take a moment to admire your handiwork. You've learned new skills, saved money, and created a truly unique item for your home. Now go ahead and enjoy your accomplishment – you've earned it!

Frequently Asked Questions (FAQs)

Q: What tools do I need to get started?

A: For basic projects, you'll need a measuring tape, pencil, saw (hand saw, circular saw, or miter saw), drill, screwdriver, sandpaper, clamps, and safety glasses.

Q: Where can I find free furniture plans?

A: Many websites offer free woodworking plans, including Ana White, Instructables, and Pinterest. Just search for the type of furniture you want to build.

Q: How long does it take to build a piece of furniture?

A: This depends on the complexity of the project and your experience level. A simple project might take a weekend, while a more complex piece could take several weeks.

Q: What if I make a mistake?

A: Don't worry! Mistakes happen. If it's a small mistake, you can often sand it down or cover it up. For bigger mistakes, you might need to start over on that particular section – that's part of the learning process!

Q: What type of wood is best for beginners?

A: Pine is a great choice for beginners because it's relatively inexpensive, easy to work with, and forgives mistakes.

Happy building!

Share:

Search This Blog

Powered by Blogger.

Blog Archive

Step-by-Step Outdoor Furniture Plans for Beautiful Outdoor Living

Step-by-Step Outdoor Furniture Plans for Beautiful Outdoor Living Hey there, fellow outdoor enthusiasts! Are you dreaming of relaxing eve...

Recent Posts